Are you tired of washing dishes by hand? Installing a dishwasher can be a game-changer in your kitchen. At Mr. Drains, we’re here to guide you through the process of installing a dishwasher in your home. Don’t worry; it’s easier than you might think!
But first, let’s take a brief look at the history of the automated dishwasher, an appliance that many today take for granted. The first patent application for a semi-automated dishwashing machine was way back in 1850. Made of wood and using a hand crank to spray water over the dishes, this version proved somewhat impractical and used more water than traditional handwashing.
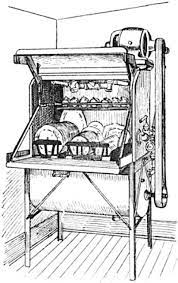
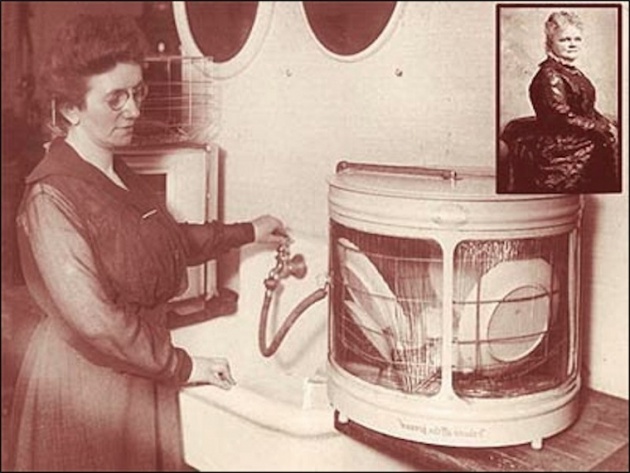

The first fully automated dishwasher was invented by Josephine Cochrane in 1887 and was presented to the public during the 1893 World’s Fair in Chicago. Gone was the wood; this version had a copper boiler with an internal wooden wheel. With the dishes slotted into framed wire compartments, a motor would spin them as they were doused in soapy water.
It wasn’t too long before we started to see the dishwasher take on a more recognisable look, similar to what we see today and along with the look came improved efficiency. It wasn’t until the 1950s that the automated dishwasher became a staple in American homes. The primary advantages of using an automated dishwasher in the home were threefold.
- Reduced water consumption
- More energy efficient
- Time-saving
With around 60% of Australian households using a Dishwasher, it still has some way to go to being an indispensable appliance in this country (90% of homes have a fridge, 86% have a microwave). Still, many newer features, such as pre-soak cycles, rotating trays, and improved sprayers, make having a dishwasher an obvious choice.
So, have you just bought your first dishwasher? Or are you upgrading? Whatever the case, let’s look at the steps involved in installing your new appliance.
Installing Your Dishwasher
Step 1: Gather Your Tools
Before diving in, make sure you have the necessary tools at hand:
- Dishwasher (Obviously!)
- Screwdriver
- Adjustable spanner
- Pipe spanner
- Teflon tape
- Hose clamps
- Drain hose
- Power cord (if not included)
- Bucket or towel
- Safety goggles and gloves
Step 2: Choose the Right Location
Select a suitable spot for your dishwasher near the sink. Ensure there’s an electrical outlet and a water supply within reach. Also, check that the dishwasher has enough space to fit comfortably.
Step 3: Shut Off the Power and Water
Safety first! Turn off the power to your kitchen at the circuit board and shut off the water supply to your kitchen sink. These precautions will prevent accidents during installation.
Step 4: Remove the Old Dishwasher (if applicable)
Disconnect the power and water supply lines if you’re replacing an old dishwasher. Carefully slide out the old dishwasher and dispose of it properly.
Step 5: Install the Drain Hose
Attach the dishwasher’s drain hose to the sink’s drain pipe. Use hose clamps to secure it in place. Make sure the hose has a high loop to prevent backflow of dirty water.
Step 6: Connect the Water Supply
Connect the water supply line from the dishwasher to the hot water supply under your sink. Tighten the connections with an adjustable spanner.
Step 7: Connect the Power
If your dishwasher doesn’t have a power cord, consult a professional electrician to install one. Connect the power cord to the dishwasher and plug it into the outlet.
Step 8: Test It Out
Slowly turn on the water supply and power. Run a short cycle to check for any leaks or issues. If everything is working smoothly, you’re ready to start enjoying your new dishwasher.
General DIY Plumbing Advice:
Here are some additional tips for any DIY plumbing projects you may be undertaking in your home:
Know Your Limits: While homeowners can do simple installations like dishwashers, more complex plumbing work should be left to professionals. Mr Drains always offers support and guidance for more difficult plumbing work.
Read the Manuals: Always consult the manufacturer’s instructions for your specific appliance or plumbing fixture. Every appliance is slightly different, so knowing the differences can save you time and money and an expensive mishap.
Shut Off Utilities: Before starting any plumbing work, turn off the electricity, gas, or water supply to the area where you’re working.
Use the Right Tools: Make sure you have the correct tools for the job and don’t hesitate to ask for help if you’re unsure. Most of the tools needed for basic plumbing DIY are available from your local trade store.
Check for Leaks: After installation, carefully inspect for any leaks. Address them promptly to prevent water damage. Unlike the pros, at times, you may miss something obvious, so a thorough check will be needed to avoid any last-minute install hiccups.
Safety Gear: Wear appropriate safety gear, such as goggles and gloves, when working with plumbing materials and tools.
Seek Professional Help: If you encounter problems you can’t solve or aren’t comfortable with, it’s always a good idea to call a licensed plumber.
Installing a dishwasher can be a rewarding DIY project that makes your daily life more convenient. Just remember to follow safety precautions and take your time to ensure a job well done. If you ever run into any plumbing issues, don’t hesitate to contact Mr. Drains for professional assistance. Happy dishwashing!
