The Evolution of the Washing Machine
Before we dive into the nitty-gritty of installing your washing machine, let’s take a moment to appreciate the remarkable journey of this household appliance. The washing machine, an invention that has made our lives immensely easier, has evolved significantly over the years.
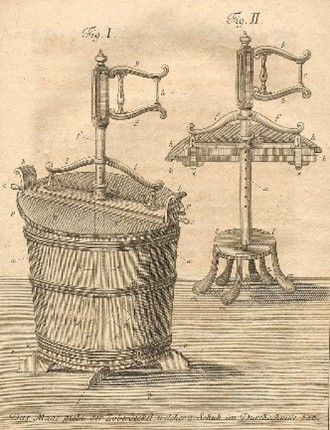
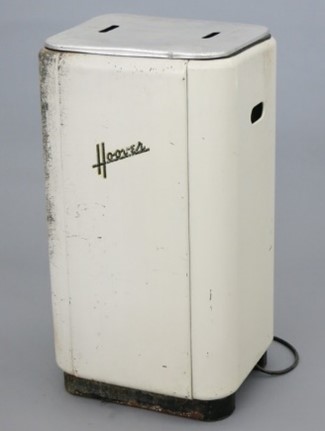
In the early 19th century, people used hand-cranked wooden drums and washboards to clean their laundry. It wasn’t until the late 19th century that the first electric washing machines appeared, which were still relatively primitive.
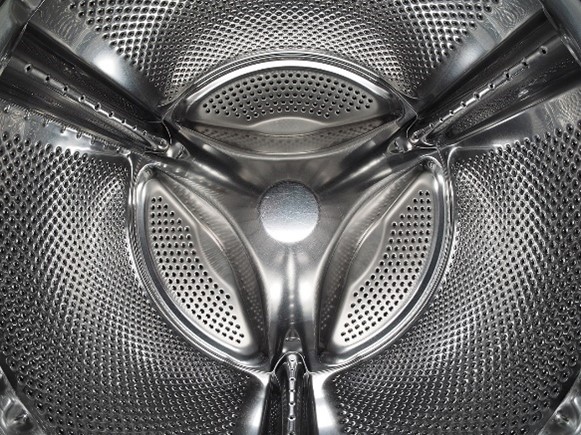
Things started to move when early automated washing machines started to incorporate grooves, fingers or paddles that would generate the agitation and scrubbing aspect of washing technology. This led to the introduction of the ‘powered’ washing drum, an innovation that resulted in far more effective washing results.
Fast forward to today, and we have advanced washing machines with many features to cater to our modern laundry needs. With various washing modes to cater for the most delicate fabrics, washing machines can now handle our most challenging items.
Now, let’s get down to business and learn how to install your washing machine like a pro!
Washing Machine Installation Steps
Step 1: Preparation
Before you start, make sure you have these tools and items on hand:
- Washing machine
- Adjustable spanner
- Level
- Screwdriver
- Drain hose
- Inlet hoses
- Safety goggles and gloves
- Bucket and/or towels
Step 2: Choose a Location
Select a suitable spot for your washing machine. It should be on a level surface and near a water supply (usually a laundry room or bathroom).
Step 3: Water Supply and Drainage
Ensure you can access hot and cold water supply lines and a drainage outlet nearby. Connect the hot water hose to the hot water valve and the cold water hose to the cold water valve. Tighten with an adjustable spanner. Attach the drain hose securely to the drainage outlet. Be sure to follow the manufacturer’s guidelines in setting up your supply and drainage hoses, as you may need to ensure the correct heights and lengths of hose.
Step 4: Level Your Washing Machine
Use a level to ensure your washing machine is perfectly level, front-to-back and side-to-side. Adjust the machine’s feet if needed.
Step 5: Plug It In
Connect the washing machine to a nearby electrical outlet. If you’re unsure about electrical connections, consult a professional electrician.
Step 6: Test the Machine
Turn on the water supply and power. Run a test cycle to check for any leaks or issues. Make sure the machine fills and drains properly.
General DIY Plumbing Advice:
Now that your washing machine is up and running, here are some handy tips for any DIY plumbing project:
Know Your Limits: While installing a washing machine is a manageable DIY task, more complex plumbing jobs should be left to the experts. Contact Mr Drains if you are unsure.
Read the Manuals: Always consult the manufacturer’s instructions for your specific washing machine.
Safety First: Before starting any plumbing work, shut off the electricity, gas, or water supply to the area where you’ll be working.
Use the Right Tools: Ensure you have the proper tools and materials for the job. If in doubt, seek guidance from professionals.
Check for Leaks: After installation, inspect for any leaks and address them promptly to avoid water damage.
Professional Help: If you encounter problems you can’t handle or feel unsure, don’t hesitate to contact a licensed plumber.
Conclusion: Enjoy Your Clean Laundry!
Congratulations! You’ve successfully installed your washing machine, bringing modern convenience into your home. The history of this incredible appliance reminds us of the progress we’ve made in simplifying our daily chores.
Remember, DIY plumbing can be a rewarding experience, but safety should always be your top priority. Follow these guidelines, and if you ever need assistance or encounter any plumbing issues, don’t hesitate to contact Mr Drains. We’re here to help you keep your home running smoothly and efficiently.
Happy washing!